You know now how to add Blocks and Items to Minecraft using Architectury. To organize all of those tin the same place, a custom creative tab is what you need. To add one you’ll need to do the following steps:
- Register the Creative Tab in the game. You tell the game that our tab should exist and for example what item should appear as its icon.
- Add your items to the Tab. We need to change our Item definition so that they appear in our new tab.
- Add a name for the Tab. We also need to add a name to our tab, as we did with everything else as well.
Additional Resources
The Tutorial Mod used here can be found on GitHub (state after this tutorial).
A video version can be found below.
Contents
- Registering the Creative Tab
- Adding Items to the Creative Tab
- Adding a name for the Creative Tab
- View the Creative Tab in Minecraft
- Video
Registering the Creative Tab
As you may already know by now, the first thing we need to register anything to the game is the corresponding Deferred Register. Using it we can populated our Registry Supplier for the Creative Tab using the following code:
private static final DeferredRegister<CreativeModeTab> TABS =
            DeferredRegister.create("tutorial_mod", Registries.CREATIVE_MODE_TAB);

public static RegistrySupplier<CreativeModeTab> TUTORIAL_TAB;

//Init Creative Tabs
public static void initTabs(){
    TUTORIAL_TAB = TABS.register("tutorial_tab",
            () -> CreativeTabRegistry.create(Component.translatable("category.tutorial_tab"),
                () -> new ItemStack(TutorialModItems.RUBY)
            )
    );
    TABS.register();
}
You may recognize the first two lines, as they are nearly identical to Blocks and Items. In our initTabs() method we call the register method on our Deferred Register and provide it first with an ID for our Tab (here: “tutorial_tab”) as well as a supplier for the Tab itself. We obtain the Tab through the create() method of the CreativeTabRegistry, which requires a Component specifying a translation key for the name of our Tab and furthermore an ItemStack supplier which provides the Item that is displayed in the creative menu. Finally we need to call the register() method on the Deferred Register to write the Tab to the game.
Adding Items to the Creative Tab
Next we want to put our blocks and items into our newly created tab. For this we need to replace the Creative Tab specified using the ItemProperties arch$tab() method where we register our items with the Registry Supplier of the tab we just created. For the Ruby we added in the Basic Items tutorial the new line would look like this:
RUBY = registerItem("ruby", () -> new Item(baseProperties("ruby").arch$tab(TutorialModTabs.TUTORIAL_TAB)));Adding a name for the Creative Tab
Finally we need to specify the display name of our tab. For this we specified a translation key using Component.translatable() earlier. We now simply add this translation key and its corresponding translation to our language file:
{
  ...
  "category.tutorial_tab": "Tutorial Mod",
  ...
}
View the Creative Tab in Minecraft
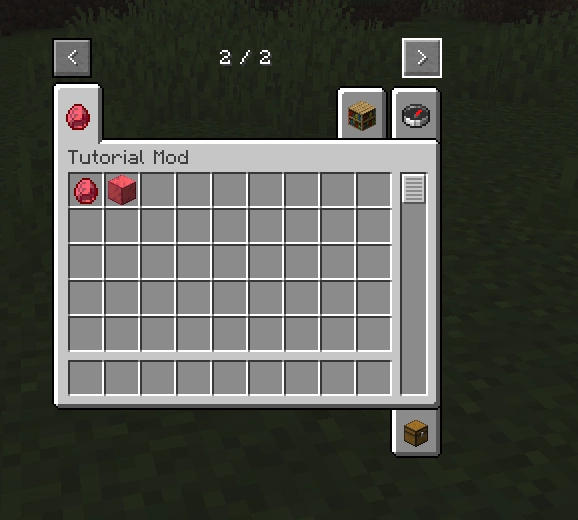
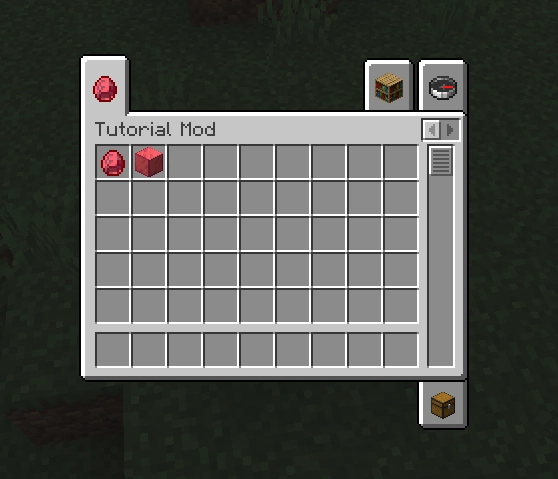
If we now start the game and open our Creative inventory, we can see our Tab appear both in NeoForge and Fabric:


With our items neatly organized in their own Creative Tab, in the next part I will explain how you can add your own recipes so that you can actually craft your own blocks and items.
Video
Please accept YouTube cookies to play this video. By accepting you will be accessing content from YouTube, a service provided by an external third party.
If you accept this notice, your choice will be saved and the page will refresh.
Related Content
Check out the entire series here.

