After you have successfully setup your Architectury project, the easiest thing to add to the game is a basic item. Thanks to Architectury we can do this without using any loader specific code. Adding an Item to the game requires four steps:
- Registering the Item to the game. This step tells the game that our Item exists, which properties it has and where it can find the path to the items resource like names and textures.
- Set the display name. For this we first need to create a language file in which the game can find all the names of anything related to our mod.
- Define the asset location. In this step we instruct the game how to find the model information related to the item. Without this the game would not be able to determine where the items model data is located.
- Define the items model. Every item in Minecraft has a model that gives the game information on how to render the item. These model information also give the game the location of the items texture.
Additional Resources
The Tutorial Mod used here can be found on GitHub (state after this tutorial).
A video version can be found below.
Contents
Registering the Item
As explained above, the first thing we need to do to get our item into the game is to register it with the modloader. Since we don’t want to write loader specific code, we will do this through Architectury.
Deferred Registers and Registry Suppliers
The first thing you need to understand is how we can register stuff to the game in a safe way. The reason for this is, that we don’t know in which state of the loading process the game is at the time our code gets executed, so we need to make sure that the registering is done safely. For this Architectury provides us with Deferred Registers, in which we can register our items without directly “writing” them into the game itself. This assures that the items are only registered when the game is ready to do so. To make sure we can still access the registered items, we use Registry Suppliers, which allow us to have a reference to the item without the item being fully registered. Accessing this reference however will only be possible when the registration is fully completed.
For Items we need to register them to our mods item registry, which we can access as follows:
//Replace <MOD_ID> with your mods modid
private static final DeferredRegister<Item> ITEMS = DeferredRegister.create(<MOD_ID>, Registries.ITEM);
Using the register method on this Deferred Register allows us to tell the Register that our item exists and gives us a Registry Supplier for that item. But to actually allow the Deferred Register to register our item into the game, we need to call the register method on the Deferred Register once all our items are registered to it:
//Write to the game registries
ITEMS.register();
Helper Methods
To make it easier for us to register our items and to make our lines a bit shorter, we are defining two helper methods. These are not necessary to register the item, although they help to make the code more readable and save us on writing the same thing over and over again. These two methods look as follows:
//Register an item
public static RegistrySupplier<Item> registerItem(String name, Supplier<Item> item){
    return ITEMS.register(ResourceLocation.fromNamespaceAndPath(<MOD_ID>, name), item);
}

//Construct an item property base
public static Item.Properties baseProperties(String name){
    return new Item.Properties().setId(
             ResourceKey.create(Registries.ITEM, ResourceLocation.fromNamespaceAndPath(<MOD_ID>, name))
    );
}
The registerItem method wraps around the Deferred Registers register method in a way that we don’t have to specify the ResourceLocation, which tells the game where to look for model, texture and name data, every time we register an item.
The baseProperties method takes an item name and constructs Item Properties for the ItemID corresponding to that name and our mod. This allows us to replace a long piece of code with a short one for every item we want to register, making our code more organized.
Registering our Item
Now we want to actually register our item, in this example a ruby, so that it appears in game and can be found in a creative mode tab. For this we define a Registry Supplier for our item and then, in our mods init() method (or another method called from this init() method), we use the previously defined helper methods to actually register our item. The code for this looks as follows:
private static RegistrySupplier<Item> RUBY;

public static void init() {
    RUBY = registerItem("ruby", () -> new Item(baseProperties("ruby").arch$tab(CreativeModeTabs.INGREDIENTS)));

    //Write to the game registries
    ITEMS.register();
}
As you can see, we call our registerItem() helper method with the first parameter being the items internal name. The second parameter is a supplier (i.e. a function that returns an item object) for our item, which we initialize with properties obtained using our baseProperties() helper method, after which we use the Architectury provided arch$tab() method to set our creative tab, in this case to the Ingredients tab. The reason we use a supplier instead of directly using our item has again to do with the way the game registers and loads the items, as we cannot initialize an item when the method is executed, but when the Deferred Register runs and executes the supplier, the game is at a stage where this is possible.
The overall code we wrote for our item looks as follows (<MOD_ID> needs to be replaced with your modid):
private static final DeferredRegister<Item> ITEMS = DeferredRegister.create(<MOD_ID>, Registries.ITEM);

private static RegistrySupplier<Item> RUBY;

public static void init() {
    RUBY = registerItem("ruby", () -> new Item(baseProperties("ruby").arch$tab(CreativeModeTabs.INGREDIENTS)));

    //Write to the game registries
    ITEMS.register();
}

//Register an item
public static RegistrySupplier<Item> registerItem(String name, Supplier<Item> item){
    return ITEMS.register(ResourceLocation.fromNamespaceAndPath(<MOD_ID>, name), item);
}

//Construct an item property base
public static Item.Properties baseProperties(String name){
    return new Item.Properties().setId(
             ResourceKey.create(Registries.ITEM, ResourceLocation.fromNamespaceAndPath(<MOD_ID>, name))
    );
}
Naming the Item
Next we are going to add a name for our item, that is displayed in the game. We create a language file in the resource folder at the path assets/<MOD_ID>/lang/en_us.json. In this file we now add the translation of our items language key:
{
  "item.<MOD_ID>.ruby": "Ruby"
}
With is the item now appears as “Ruby” in the game.
Adding Texture and Model Information
The last step for adding an item is to add the model and texture information of it. For this we need to create multiple folders and files in the following pattern (Mod ID: tutorial_mod, Item: ruby):
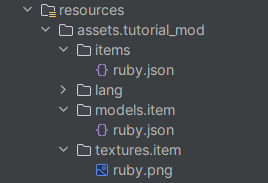
At the path assets/tutorial_mod/items/ruby.json we create a file that tells the game where the model information is located. It has the following content:
{
  "model": {
    "type": "minecraft:model",
    "model": "tutorial_mod:item/ruby"
  }
}
The model data itself is located at assets/tutorial_mod/models/item/ruby.json. We first define the parent of the model, deciding how it is rendered. In this case we use the regular item, but there are other values, for example for tools. Next we give the information where the texture is located. In the file this looks as follows:
{
"parent": "minecraft:item/generated",
"textures": {
"layer0": "tutorial_mod:item/ruby"
}
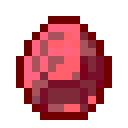
}The last file we need is the actual texture of the item. The texture is located at assets/tutorial_mod/textures/item/ruby.png. The texture used in this example looks like this:
Item in Game
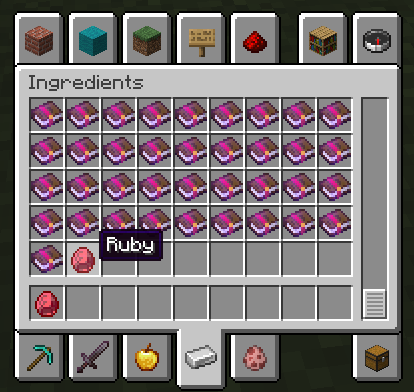
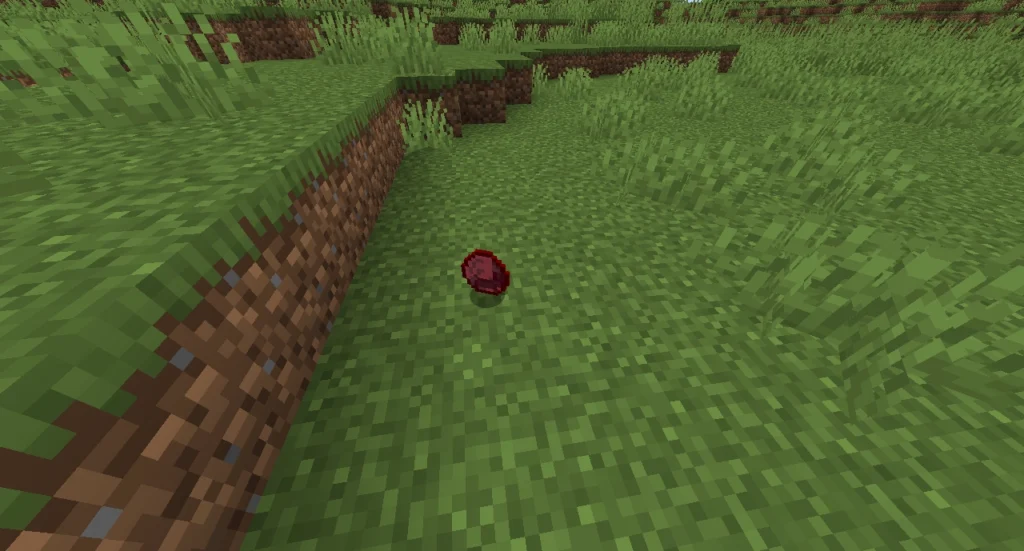
Below you can see how our item appears in the game. It can be found in the Ingredients tab of the creative menu, as specified. Furthermore, when dropped it appears with the regular item model.
With that we have successfully added an item to the game using Architectury. In the next part we will add a Block to the game, again only through Architectury code.
Video
Please accept YouTube cookies to play this video. By accepting you will be accessing content from YouTube, a service provided by an external third party.
If you accept this notice, your choice will be saved and the page will refresh.
Related Content
Check out the entire series here.
Pingback: Basic Blocks– Architectury API Multiplatform Modding - Larsen's Mods
Pingback: Tools and Swords - Architectury API Multiplatform Modding - Larsen's Mods